Tuesday, July 14, 2009

Dog Days of Summer and Break Time

Well not really, the weather in southern MD during the summer this year, has been exceptionally nice. Along with it comes more time outdoors with friends and family and less time at the painting table. My wife and I just bought some bikes and plan on enjoying some bike trails and the great outdoors.

This leads up to my break time, I'm not stepping away from playing Warmachine, just the painting aspect for a couple of weeks or so. I find myself going in phases where I'll really want to complete some warjacks and then a warcaster and I work hard to do it. Then, out of nowhere, I want to work on terrain. I guess it's because Barret has been working on his table that has inspired me to finish up a couple of wips I've had for a long time.

Specifically speaking, I have a desert terrain hill that looks sort of like a skate board ramp that's almost complete. The idea behind it was to have two of them face each other to make a valley or ravine. My inspiration came from the same article Barret is using for his table. You can see it here. I should have some time in the few weeks to finish it up and then work on other things, if the mood strikes me.

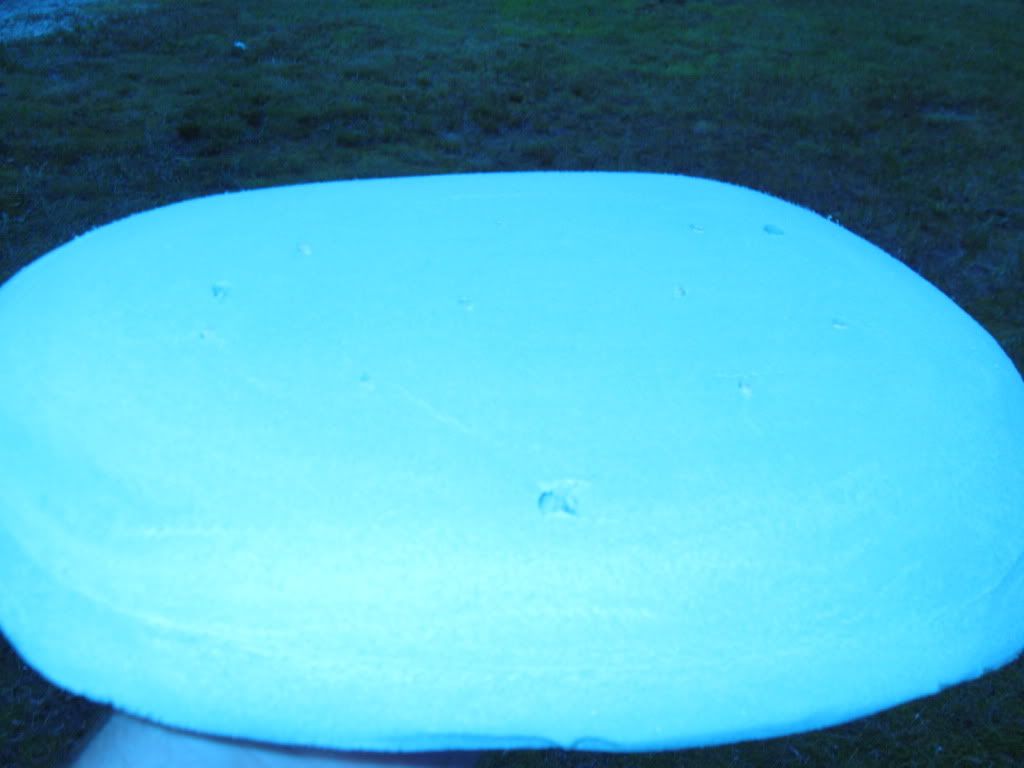
Here is the first stage of the hill.

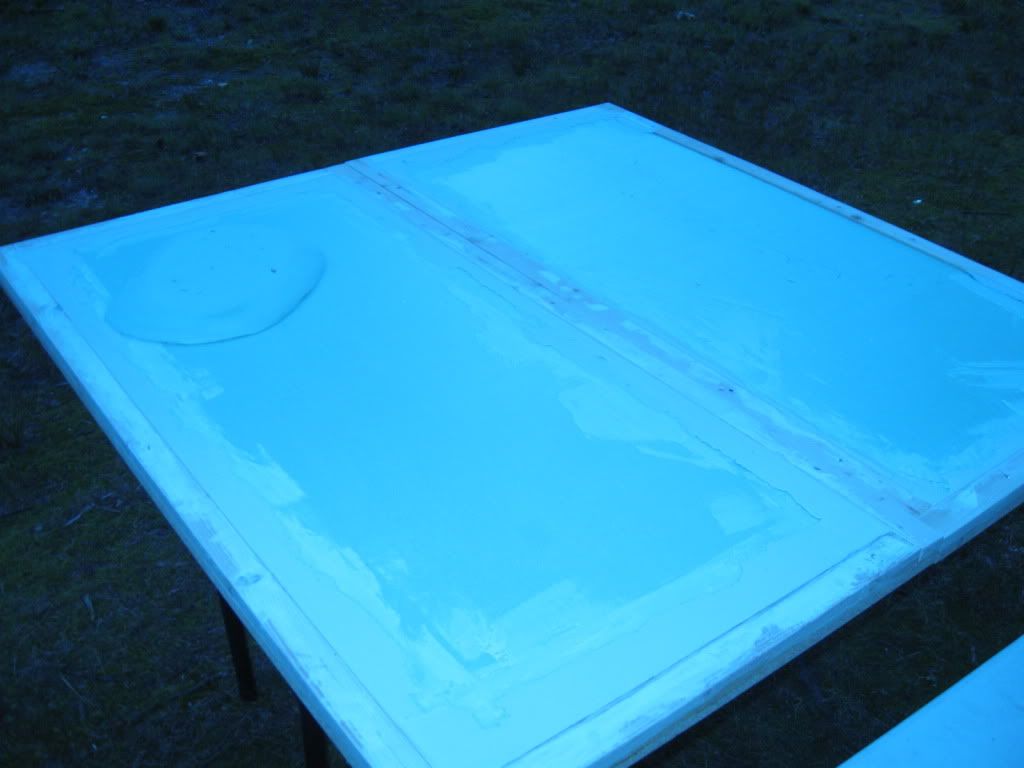
The second stage after I used a dremel to carve it up and give it shape. Notice a little feline in the back, inspecting things. That's my painting buddy.


Here's a side view of it.


After the hills are completed, I'll probably try to make those tall rocky, desert pillars, not sure the name of them. And then after that, I'll probably finish my Repenter and Revenger, to complete my "Before and After" painting project. Who knows how long this will take but that's the fun thing about table top gaming, there's always something you can be working on.

Hopefully Barrett's table will be finished soon and we could possibly play a game outdoors. How bout that, play Warmachine and enjoy the outdoors at the same time.

A Place To Call Our Own, MkVI

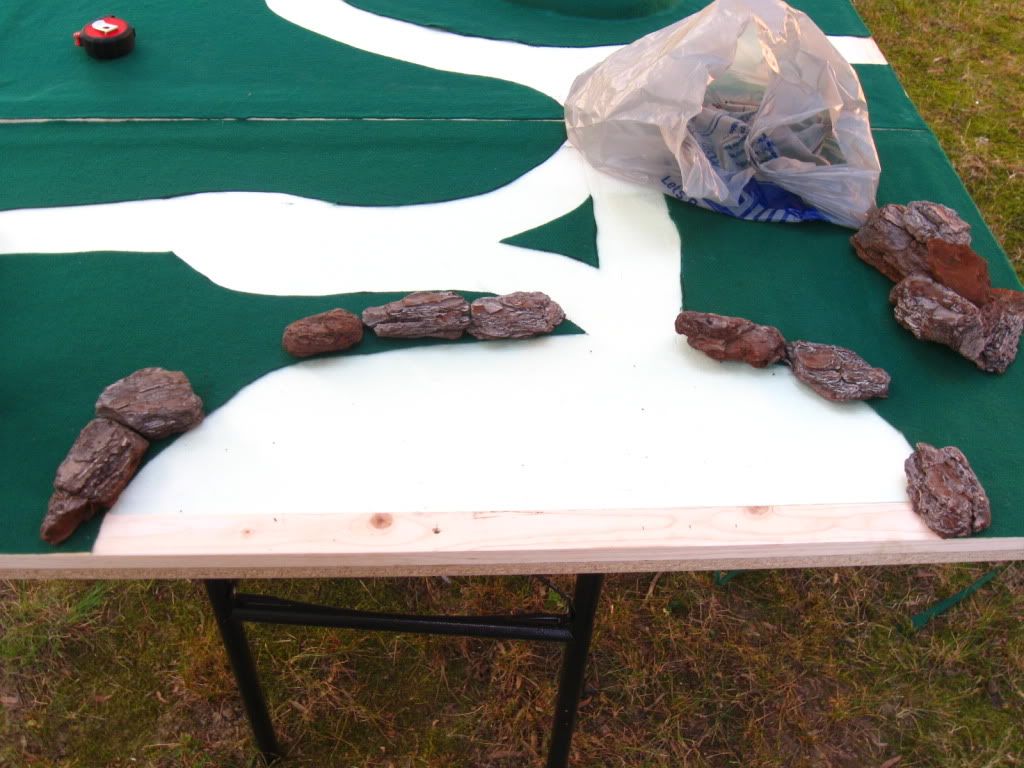
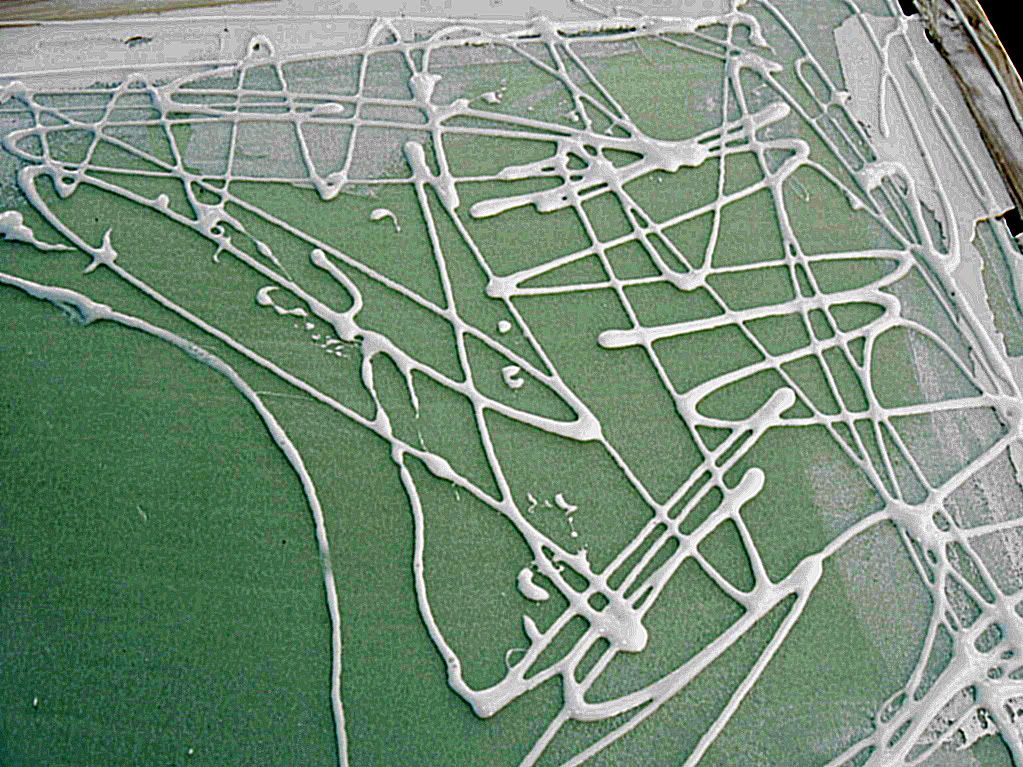
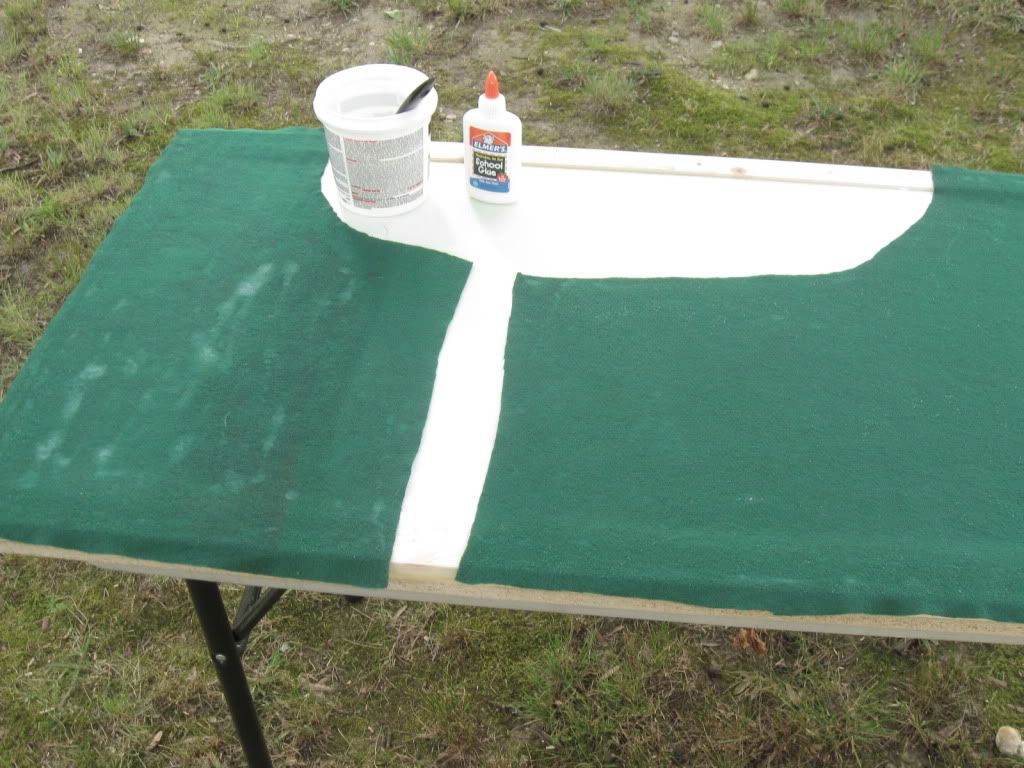
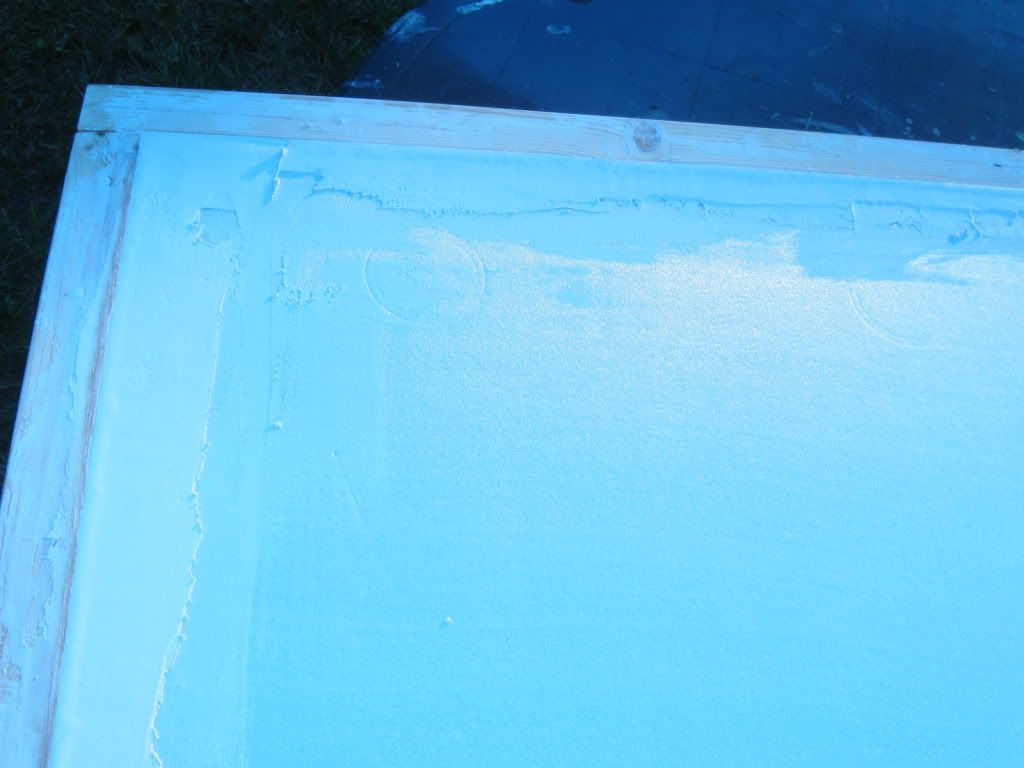
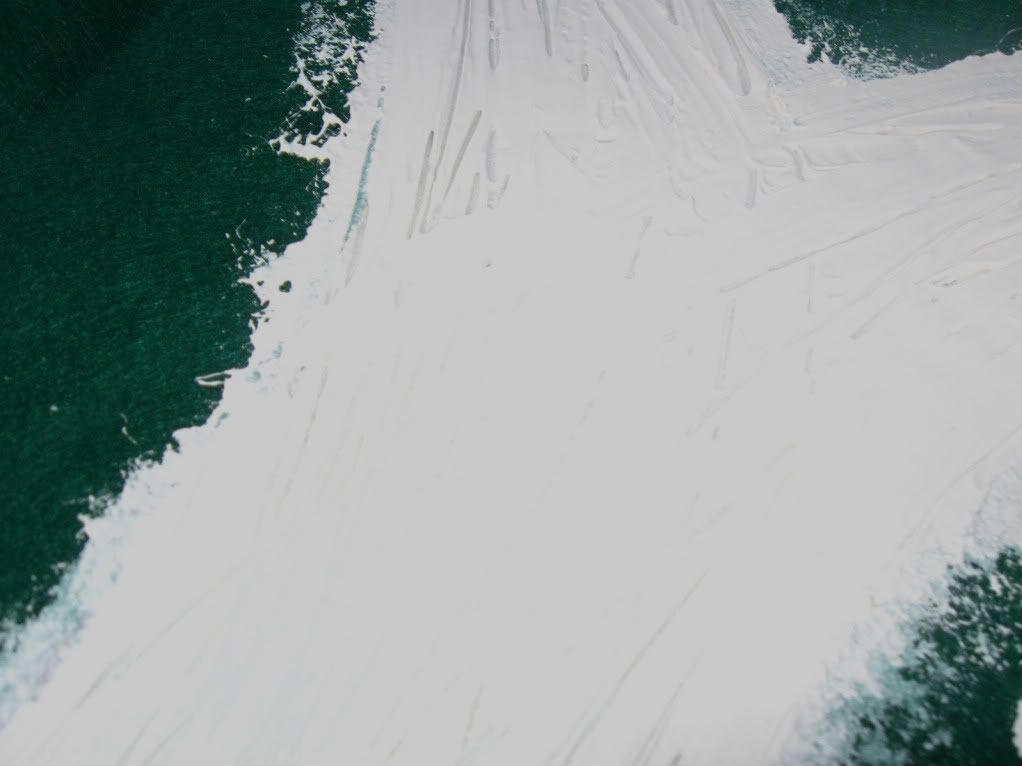
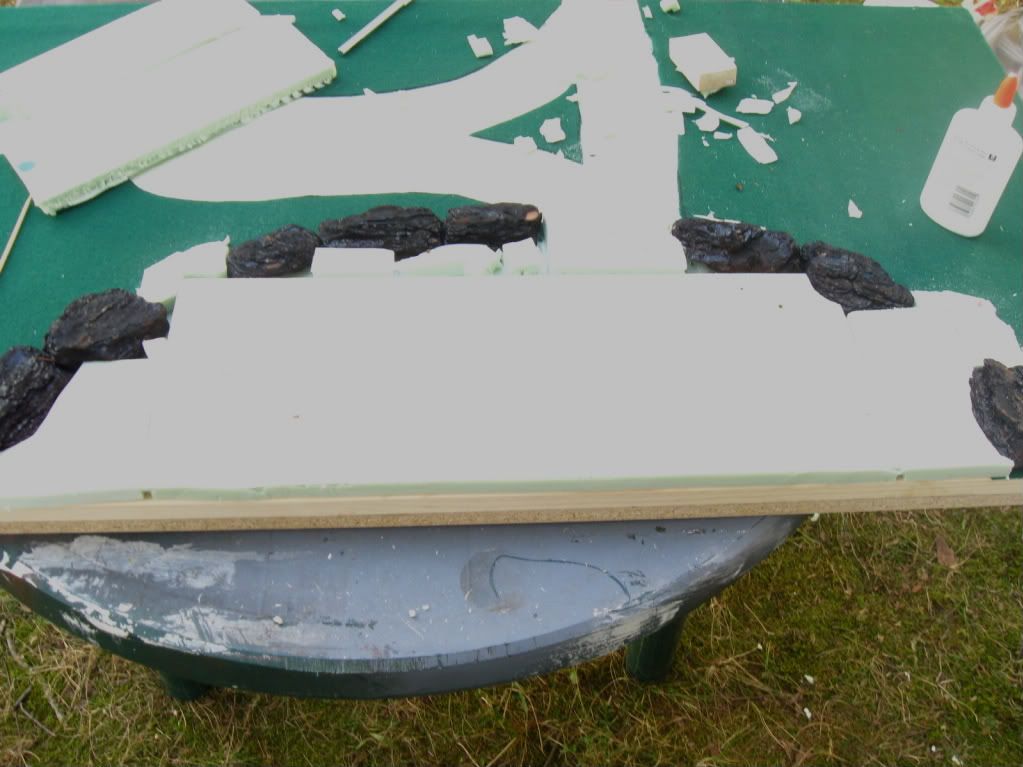
Last night, I got to work on the most anticipated part of this project for me: the cliffs and the roads. I started off with the pine bark and my hot glue gun. Hot glue will work more effectively when gluing to felt than white glue, and it also allows me continue immediately. So I laid out the bark and attached it. Then, I took a scrap of foam and started to back fill behind the bark. Cut and fit the foam around the bark as well as possible. I used white glue and skewers to hold it. Fill in gaps with small chunks of loose foam. Anything you can fill in with foam will save you on plaster later on. I also worked on three ramps that will allow access to the hill. This is a messy process. Make sure you blow the tables off before you start on the plaster.

After the cliffs were filled in, I started to work on the plaster. I laid it on the bark eccessively. The point here is to bridge the gap between the top surface of the bark to the foam. You want the cliffs to look like they are a part of the hill, not like someone laid them next to it. There were a few spots where the bark was taller than the foam, so I had to double up on the foam. We'll see later if I'll regret that decision visually, but it will give some elevated platforms to shoot from.

Once the cliffs were molded, I started on the roads. Put the plaster in the middle of the road, spread to the edges, the run the spatula down the middle of the road to give it the proper flow. I also ran the edge of the spatula through the road to make ruts, then lightly dragged it over them to lessen its impact.

These boards are nearly done and ready to paint. I will likely hit these (at least the cliffs) with my sander (or sand by hand) just to smooth it out a little. I also have some felt to put on top of the hill. Once these are finished, I am going to hit them with textured paint and start the painting process. Before that, these will need a lot of time to dry, so I likely won't return to this till next weekend.


Friday, July 10, 2009

A Place To Call Our Own, MkV

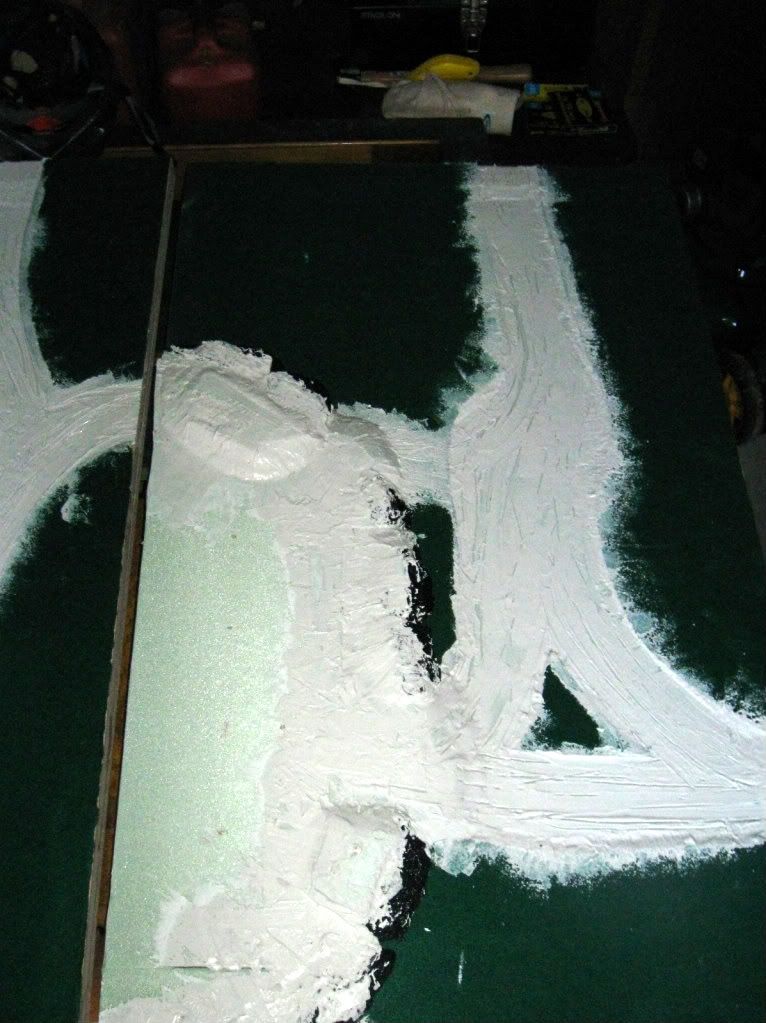
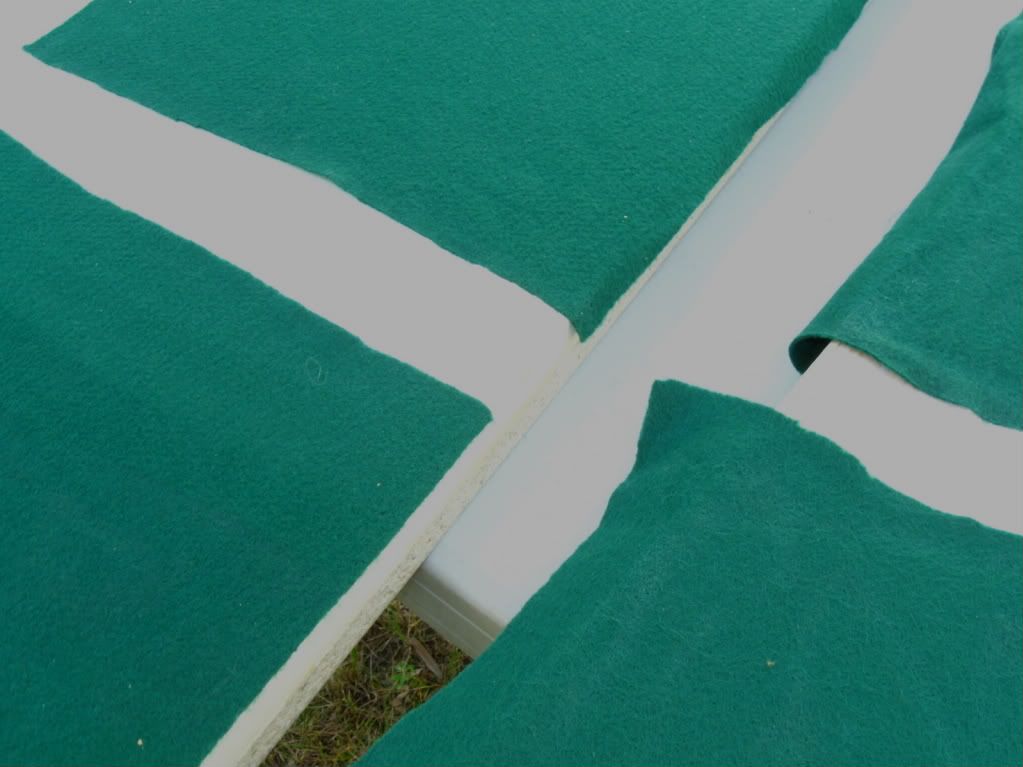
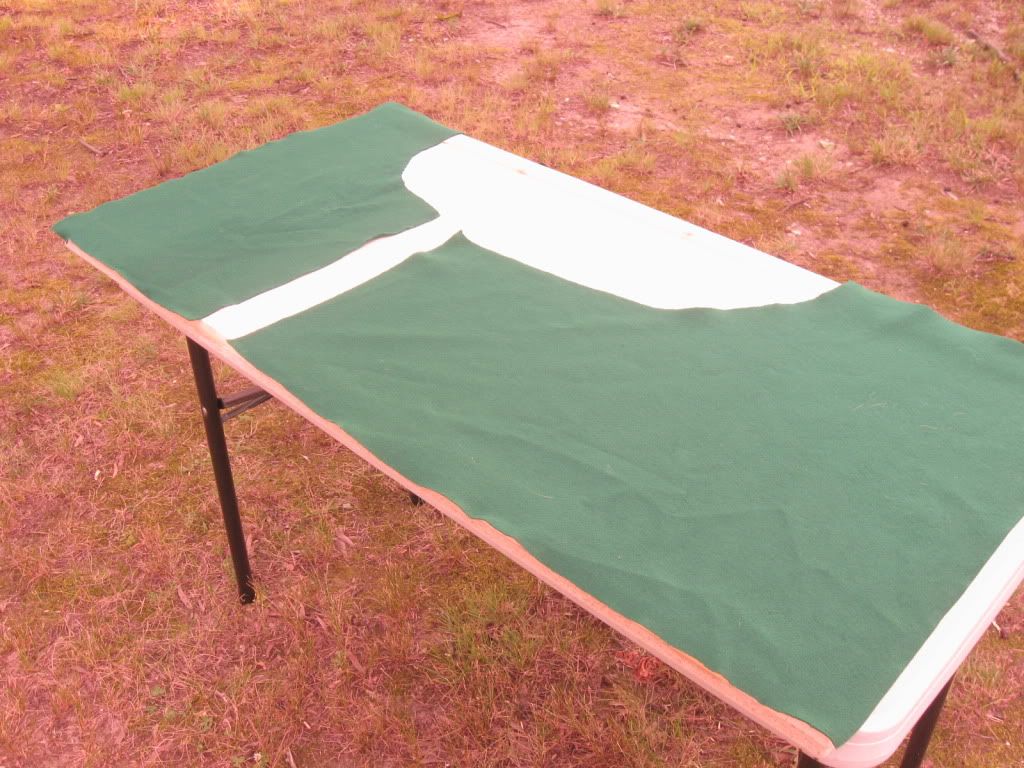
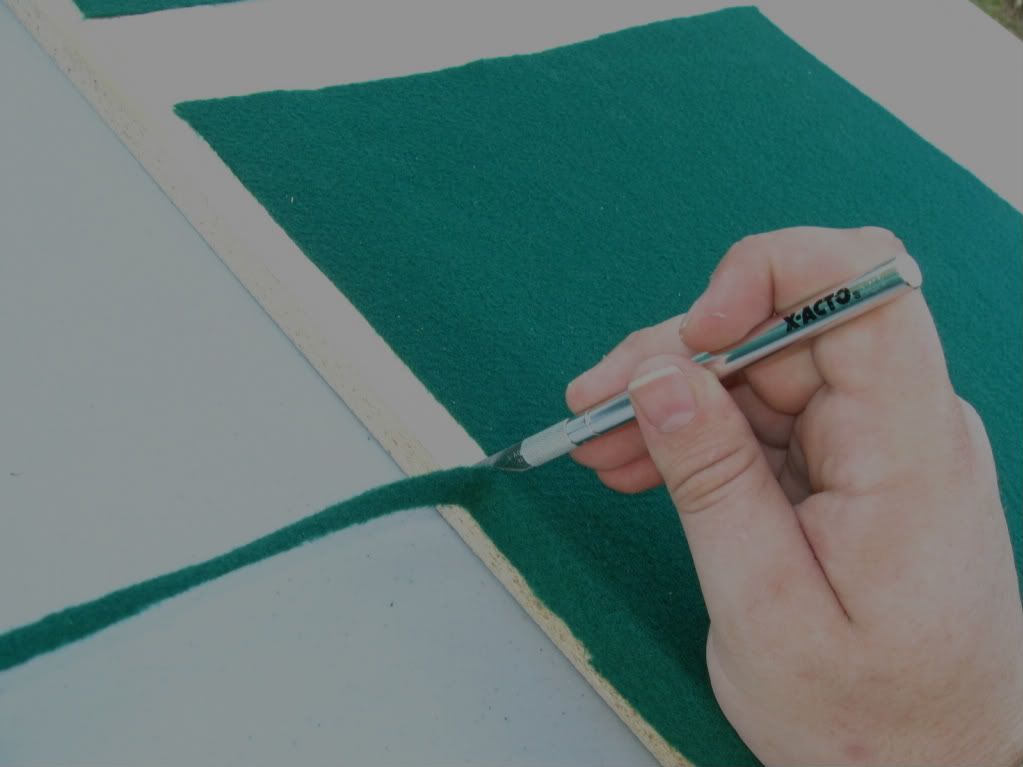
One thing I enjoy about focusing on a project with end goals in mind is that you can seem to find spare moments to work on the project. I had some of these moments last night, so I was able to trim the felt and put in the roads. I also undercoated the bark that I will use for cliffs.

Using the edge of the board as a guide, I trimmed up the felt . This is why it is important to leave at least a 1/2" of felt around each side, because anything less will be hard to cut. A good buffer on the sides allows you to hold onto something while trimming and you can pull it away as it separates. Make sure you're using a sharp blade so you won't tear it. Here, you can see the trimmed edge (bottom left) and three more untrimmed edges.

The next step was to draw out the roads with a black Sharpie. I measured out where the roads would join the edge of the board to make sure that the boards are interchangeable. I centered each road at 16" from an edge, and made the roads 3" wide. Then, I free handed the roads on the felt and cut them out with my knife to just the outside of the line. I'm not very good at free handing, so any goofiness in the roads can be fixed when I lay down the plaster surface for the roads. Finally, once the roads are cut out, pull up the felt, keeping your hand on the side that won't be removed. Again, go back with your glue and spot fix anywhere the felt is coming off.

My final step for the night was to apply black spray paint to the pine bark I would be using for the cliffs. I laid out the bark in the design I'd planned, then moved them to my painting surface and sprayed them. I will likely have to wait till Sunday to work on the cliff and roads, but the bark will be attached with a hot glue gun. I'm looking forward to this step the most!

Wednesday, July 8, 2009

A Place To Call Our Own, MkIV

A sick daughter canceled my plans for the evening and gave me a chance to work on the table. I'm sorry my Anna had to suffer, but I really am glad I got to work on it! I finally spread the felt! It's starting to look like a real table.

The night started with some sanding. A lot of the plaster started to break off from the vibration, but I was able to smooth out a few rough spots. The part I focused on most was smoothing out the edges to minimize splinters in handling. I had the right idea with the plaster, but it didn't work too well. Once the felt was on, I could really see the indentation where there were gaps. I'm hoping that the paint and effects will draw the eye away from the valley that they'll be moving through... At least it will keep the dice on the table.

First off was to rough cut the felt to the shape needed. I wanted to minimize the waste of the felt, and stretch another 2x4 board out of the 72"x54" piece. For this, I roughly cut where some roads would end up in order to make it last. You can also see where the cliff will eventually go. Once the pieces were cut, with a 1/2" overlap around the edges, I spray them with the hose.
By moistening the felt with water, it prevents the felt from soaking up the glue too quickly. As the glue dries, the felt will stick. I started by spreading the glue around the edges, with a continuous bead, then I spread it everywhere. Don't skimp here. I went through four 4 oz bottles for the two boards. As you can see in the pictures, the glue will seep through the felt in areas where it is really thick. This is fine, because it will dry clear. Work one piece at a time to keep the felt from drying out too quickly.

I decided to add the hill before I covered the felt. Trying out the piece I cut showed that the felt would stretch well. So I shoved a number of penny nails into the base, with the points sticking up, and covered the area with glue. Then I pressed the hill down on the nails. To attach the felt, I focused a lot of glue around the seam where the hill connected with the board and coated the top of the hill. I started the felt on the hill and pressed down into the creases. Keeping one hand on the base of the hill at all times, I worked my way outward to the edges. In this way, I was able to simultaneously keep it from wrinkling and from stretching away from the base. I've now put the two boards away to dry. Tomorrow night looks unlikely, and I promised my wife I'd work on the house all day Saturday if I could work on the board all week. I'm hoping to work on this again on Sunday afternoon.

Next up, I'll cut the felt to its final size and reglue anywhere the felt is pulling away. Then, I will turn my focus towards the cliffs. In order to incorporate then in properly, I think they need to be done before I start on the roads. So I'll build up the cliffs, using pine bark and foam, then work on the roads, cutting into the foam and laying down spackle. Once the roads are laid out, I'll focus on adding some texture, then start painting. Though I know how long painting can take, I feel like the hard part is already behind me! Here's hoping the felt stays glued on...

A Place To Call Our Own, MkIII

Apologies in advance for the pictures. I was working on this outside at dusk and did not think to compensate for the light balance on my camera.

Day 2 focused on bridging the gap between the edges of the board and the foam, a small gap of maybe 1/8", and building the hill that would be permanently attached to one of the boards.

The day started off well as I was looking for Elmer's White Glue, since I had used my supply the prior day attaching the foam. I checked Target, Michael's, and Office Depot, until I found a great deal at Wal-mart: 4 oz glue bottles for $.25 each. For $3, I picked up the equivalent of a quart of glue (which cost $8 at Michaels). That should last me a while. Sure, it's washable School Glue, but I don't plan on exposing my board to the elements, so it should suffice.

I started working on the board that would have the hill attached to it since I'd need that board first to work on. In retrospect, bridging this gap was probably highly unnecessary, as the gap would probably not be noticed under the felt and it used the rest of my quart of spackle. I'll need to pick up another quart to do the roads and the cliff face now. But I finished the boards and set them aside to dry. I won't be working on these tonight, but I plan on sanding them down on Thursday night. I will also take my sander to the edges of the boards to ensure the trim and the MDF match up and the two boards fit together tightly. If I had focused on getting a tighter fit with the foam, sanding down the trim a little bit would have handled the gap issue without the spackle, and I could have spread felt last night. Oh well. I'm learning.

If a blade is foam's worst enemy, the a sander is its best friend. I started by cutting our a rough shape in my 10"x14" double-thick piece of foam from the prior night. At one point, I got so frustrated with my dull blade that I started hacking chunks off of it with my spackle tool and ripping them off. Real professional, I know. So I turned to my sander. I have a two-handed Orbital Sander that takes a half-sheet of sand paper. I loaded it up with 100-grit paper and started to shape. A rougher grit would have done the job a little faster, but this worked well. As I was sanding, I discovered that the glue from the prior night hadn't set entirely yet, and the hill had very little lateral strength to it. So I decided the reinforce the join to give it more sheer resistance. For this, you could use toothpicks or a wire hanger, though you'd want to watch where you sand with a hanger, as it will eat through your sandpaper. Lacking toothpicks, I went with some wooden kabob sticks I'd saved earlier in the year. When in doubt about something crafty, save it. I shoved 10-12 1" lengths of these through the hill to hold it tight and continued sanding. For this hill, I wanted height and didn't want it to be stepped. So it is a little steep in the ascent, and models likely won't be able to stand on the side of it. I may ease out the slope a little more tomorrow night, but I'm overall pleased with how well the sander worked on this.

So my work for the night is finished. I had my wife check Weather.com to see if there was a chance of precipitation for the night and there wasn't so I left these outside. Sure enough, at 10pm, we heard rain. I was able to get them in without them getting wet, since they were set up under a tree, but I'm thankful my wife thought she heard rain. We checked the radar on Weather.com and sure enough, there was one lone cloud sitting over our town, with not a cloud anywhere else in the state visible. Hilarious. Thursday night will consist of sanding down the spackle and finally spreading the felt! I'm thinking over how I'm going to spread the felt over the hill, at this point. I'm not sure if I should cover the hill separately, or incorporate it under the main felt. I want to minimize cuts and wrinkles in the felt, but don't want it to look like it is a separate part of the landscape.

Monday, July 6, 2009

A Place To Call Our Own, MkII


Day 1 was off to a running start. It went a lot faster than I thought it would, once I started.

The basic design is 2 pieces of 2x4 compressed board, with a 1"x2" pine frame around it, to protect the 3/4" sheet of polystyrene. Materials and estimated prices follow:
(2) Sheets of Compressed board, $6.50 ea
(1) Sheet of Polystyrene, $10.50
(3) 8' lengths of 1x2 pine, $3 ea

I actually have enough Polystyrene (foam from here on) to do two more boards, since I'm not using a full 4'x8' length. So another $22 and I can have two more modules. I also bought
20 #6 1 1/4" screws for the pine trim, only to discover I had #8s in the same length.

I began by drawing the design on the two boards just to get a scaled idea of the layout. It turns out that the 24"x48" boards are actually 24 1/4" x 49". As much as it bugs me that it'll be off by 1/4" on one side, ripping a 4' length of board, for only a bit more than a blade's width and without a table saw, would bug me even more. Connecting roads won't be off that much. The extra inch on the long side was easily remedied. I then began framing out the board. This would give it more strength and keep the foam from getting banged up.

When I first pictured this board, I had grand visions of perfectly mitered corners and superb craftsmanship (with pine and MDF). Then, I woke up, realized that I did not have the proper tools for miters (I freehanded one with the circular saw), and decided that there was nothing wrong with a simple butt joint.

Someday, I'll make the $5000 table with dovetailed storage drawers, but for now, I'll stick with my strengths. I was able to make it so that the end-grains point toward the deployment edges, so they won't be visible from the side. Small victories... I'm also glad that I made this decision after making only one mitered corner. I was able to correct it, without too much hassle. Anways, I glued the trim, then strengthened the attachment with screws. This board is heavy and durable. After lifting these with only the frame attached, I would definitely recommend 2x2 boards if you are planning on transporting them.

I framed one corner of the board, then cut the foam before framing the other two. This helps to ensure that I have a tight fit for the foam. I framed 1 corner, put a spacer in (of the same width as the trim), and flipped it over on top of the foam to cut it. This worked really well and gave me a straight edge to cut. This foam dulls blades fast, but since the edges will be hidden, I didn't care if they were jagged or at a slight angle. Once the foam was cut, I framed out the other two edges, test fit the foam, then applied glue and pressed it in. At first, I thought gravity and the tight fit would keep the foam in place to dry, but by the time I had finished the second board, the first had popped up in the middle and needed to be reglued. I have an abundance of books, so I took the boards into my office and will now let them dry overnight. I also threw together two 10"x14" pieces of scrap foam for the built in hill.

The hill will be my next step. Also, the foam is slightly smaller than the trim, so I will apply plaster around the edges to smooth it out. This will all be hidden under the felt, and the edges will ensure that the boards are the same heights where they meet up. But this step will prevent models around the edges from being off-balance. So, tomorrow (hopefully) I will work on the hill, smooth out rough edges, and maybe even start on the felt. I am going to do the cliff section after the felt, the hill before. Then, I need to assess my paint supply. I've collected cans of paint over the past few months from the mistake rack and I'm pretty sure I have what I need.

A Place To Call Our Own

Up until now, the preferred gaming surface of the Smib Thralls has been a glass coffee table with a piece of green felt draped over it. The table is approximately 40" x 48". When we want to play a 48"x48" game, we break out two folding tables, with the 4x4 grid marked out on the felt. For a while now, I have been talking about building some modular gaming boards to play on, but have been delayed by one thing or another.

Today was my final CPA exam for the summer, so I now plan on having a lot of time and mental capacity on my hands. I may even paint a second warjack... But the primary focus of my free time over the next week or so will be the construction of two 2'x4' boards that the Smib Thralls will be able to play on.

Here is a rough sketch of my goal.

The main resource I am using in the design of these boards is a series of articles I found at www.quindia.com. The designer did 12 articles step-by-step through his own 6'x8' board and I've found them very helpful. He makes a short case for 2'x4', instead of 2'x2', stating that the modeling possibilities are greater with the larger surface and I've come to agree with him. I will have enough foam and felt left over from this board that I'll be able to create another 2'x6' with the purchase of only 1 more piece of MDF. This other piece I'll construct in the future (likely next month) is also the reason I took the design steps in these boards that I have. Many people prefer to have open boards and add terrain, like hills, for more gameplay variety. But we've been playing on a flat surface for a year, so I like the instant difficulties that will arise from these boards. The top board will have a cliff surface running along one edge. This will limit the usability of the board, since it cannot be rotated, but I think it'll be worth it visually. The second board will have a permanent hill in it, but since it can be rotated, the hill can be either in the semi-middle of the board, creating a narrow valley with the cliff face, or rotated out to be in the deployment zone, as seen in the picture, allowing a large open playing surface. Future boards will incorporate a river and a swamp, but that is a difficulty level that I need to work up to. The last interesting terrain feature will be a space in between the Y in the road on the top board. This space will allow for an old aged tree to be used, or a pile of rocks, interchangeably depending on our desire for visibility and LOS.

So, I've done the write up. I'm off to get to work on it outside. I'll try to take pictures as I go along, and not just in the between steps.

Wednesday, July 1, 2009

Grind Speculation


Phill just pointed this out to me when I called to tell him about the new Retribution models on the front page.
(On that, the models are exciting me a lot more than the jacks did. I really like the warrior models for Retribution. Not going to collect though. Must save up to begin MkII with Skorne/Legion)

But I'm excited also by Grind. I never played the house rules version that was released in NQ10, but as someone who is trying to get as many people interested in playing PP games that wouldn't necessarily invest time in WM/H, Grind excites me. So here is my speculation of what PP will need to do to expand their current customer base.

1) These need to be fully-painted out of the box. The models are already in plastic, and PPS_Kevin revealed on TGN that they are close, but different, to WM in scale. With 32 interchangeable weapons, this will produce only frustration if they all need to be color coordinated between two teams. Fully painted jacks will allow people to start right away.

2) It needs to cost less than $60. I've seen some really wild speculation that this game will cost anywhere from $90-150, but I seriously doubt a price tag like that attracting anyone who isn't already playing PP's line of games. Even if priced at $60, if they scale is obviously different and the details on the model simple enough, those who would try to use these for WM would look like idiots. These cannot be priced comparatively to WM, even WM jacks done in plastic.

I'm looking forward to this game. I'm hoping to use it at game nights at our church and I want to get my wife playing it. I never did MonPoc, even though it has the two features I just speculated on, because I don't care for Godzilla/Alien warfare. But I like Steamjack sports, since it will be close enough to WM/H and the IK theme to perhaps garner interest in diving further in, but not as complicated to turn people away at the beginning.

Me and my wife play Infernal Contraption a lot. I'm looking forward to a game that gets even closer to the WM mechanic and feel, without the hobby aspects that I enjoy so much. Whatever this game will be, I'm sure it will be 100% PP, which means it will be quality.